
Place the masks left to right: Weeping, Malformed, Blissful. That releases the Loomis Park bell after you clear Silver Pines Town Hall; then use the Crank Handle to drain the Sewers, open valves A, C, and B, and overload the hatch to reach the sewer bell. Bring the Crank Handle from silver pines church hill before tackling the sewer machinery or returning for the optional clock reward.
Where do you find the Town Hall keys and mask materials?
Collect the Fireplace Tongs and Empty Mold downstairs, the Office Key beside the locked meeting room, and the Unmixed Clay and Manhole Cover Key upstairs.
Town Hall is northeast of the Loomis Park entrance. Clear the enemies in its entrance passage, then work through the building in this order:
- Go left past the stairs into the room marked with a Phone sign. Save at the phone and take the Fireplace Tongs from the basket beside the fireplace. For the phone mechanics, see silver pines how to save. Crouch through the fireplace and hit the wind chime on the other side for a Memento Vessel Shard.
- Enter the Main Hall through the double doors to the left. Pass behind the stage, where a Storage Container lets you prepare your inventory, and take the nearby door. Inspect the jacket hanging on the ladder beside the locked Community Meeting Room to get the Town Hall Office Key.
- Continue east to the furnace. Enter the room beside it and take the Empty Mold from the table at the far left. You now have the mold and the tool needed to retrieve its fired contents.
- Return to the entrance stairs and go upstairs. Take the Pinned Note and Town Hall Map from the notice board. Use the Office Key on the gate marked Office; the gate opens the route to the third floor.
- Before climbing that staircase, take the door on its left to the balcony. Pick up the Blissful Mask there.
- Upstairs, clear the enemy and take the Unmixed Clay above the sandbags. Enter the Office and collect the Manhole Cover Key above the filing cabinet on the right. The open office window leads onto the scaffolding and the clock.
The third-floor candlestick does nothing on this first pass. Leave it until you've set the clock; collecting the mask materials is the useful job here.
How do you get the Weeping Mask and Malformed Mask?
Use the Manhole Cover Key for the Weeping Mask, then mix and fire the clay to make the Malformed Mask.
Return to the manhole near the Loomis Park sitting area. Unlock it, climb down, and go left to pick up the Weeping Mask. This is a short pickup route; the mask is below the park rather than inside Town Hall.
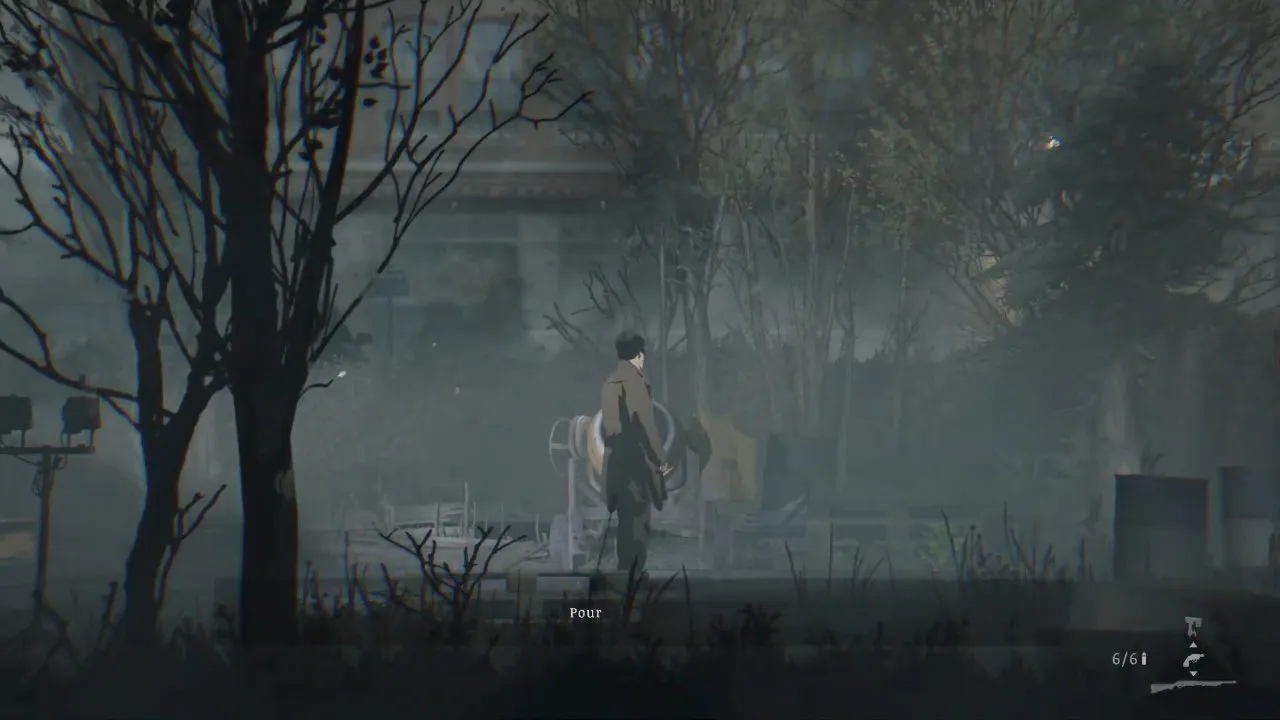
For the Malformed Mask, follow the crafting chain rather than putting raw clay straight into the furnace:
- Pour Unmixed Clay into the Loomis Park concrete mixer and collect Clay Mixture.
- Combine Clay Mixture with Empty Mold in your inventory. The result is Filled Ceramic Mold.
- Put the Filled Ceramic Mold into the Town Hall furnace.
- Use the Fireplace Tongs to retrieve the Malformed Mask.
Once you have the fired mask, walking back through the Main Hall brings you to a red glow and a boss encounter. Prepare at the stage's Storage Container before entering. Keep your distance and dodge its close swings and ground strike; staying close gives its melee attacks more chances to connect. When the boss falls, leave through the front door and return to the park statues.
What is the Loomis Park statue mask order?
Put the Weeping Mask on the left statue, the Malformed Mask in the middle, and the Blissful Mask on the right to release Cable Station Bell (F).
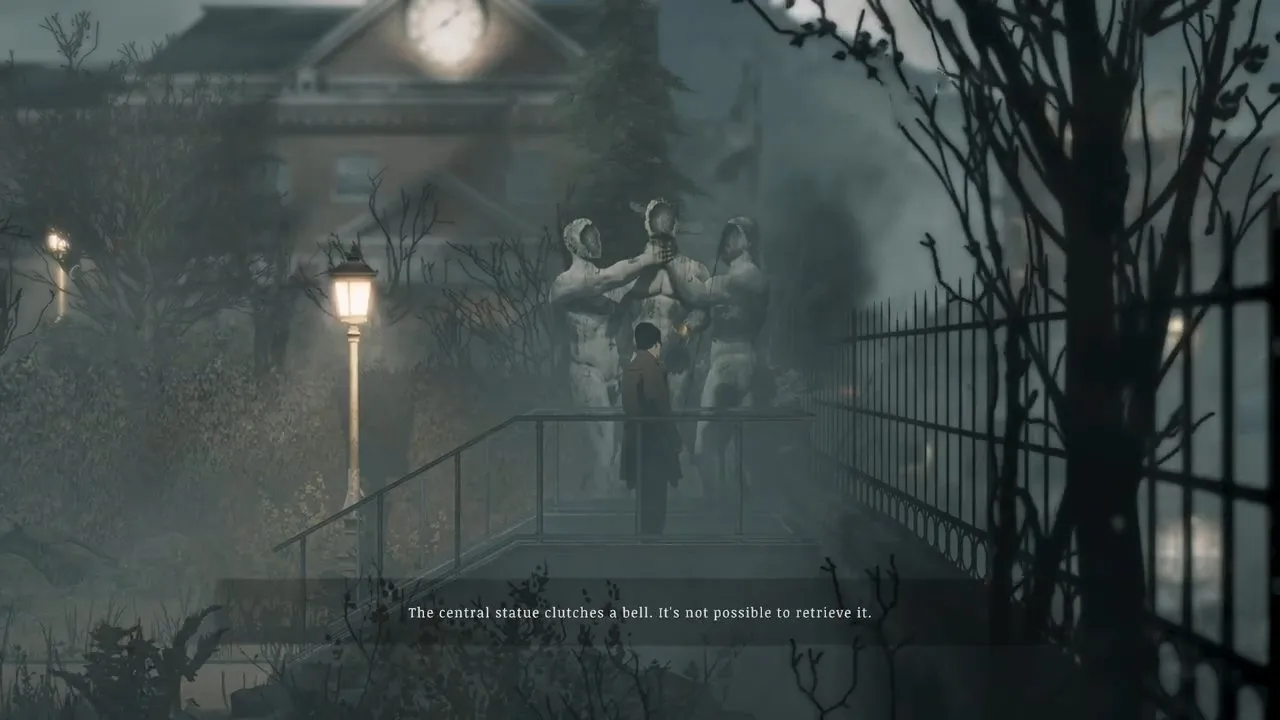
The bell looks like something you could simply grab, but the defaced statues are the lock. Match your inventory masks to these positions:
| Statue position | Mask |
|---|---|
| Left | Weeping Mask |
| Middle | Malformed Mask |
| Right | Blissful Mask |
The confirmation is the bell coming loose so you can pick it up. Taking it triggers a cutscene and returns you to the Cable Car Station.
How do you solve the Town Hall clock puzzle?
Fit the Crank Handle into the roof clock, set it to 10:07, then pull the third-floor candlestick to open the secret room.
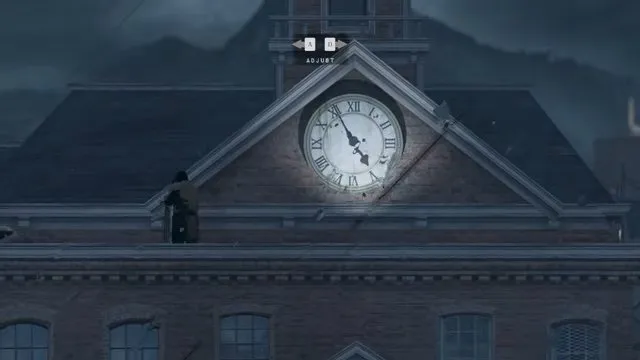
This is an optional return trip once you have the Crank Handle. Climb out through the Office window, follow the scaffolding to the clock, and fit the handle into its panel. Aim for 10:07; 10:06 through 10:08 also counts. For other numeric locks, keep silver pines codes handy.
Go back to the third-floor corridor and pull the candlestick that was inactive earlier. The secret room opening is your success check.
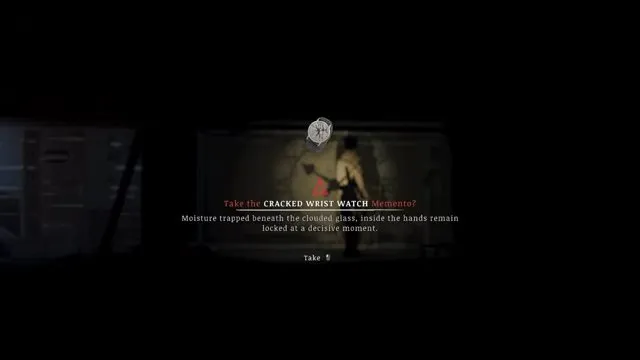
Take the Cracked Wrist Watch memento inside. It makes melee attacks faster and stronger when you're badly hurt. Treat that as a bonus when health is already low; deliberately staying hurt makes the next hit harder to survive.
How do you drain the Sewers and get the Sewer Key?
Install the Heavy Mechanical Cog in the sluice machine, connect its gears, and use the Crank Handle to lower the water and reach the Sewer Key.
- From the Pet Clinic, break the board to the right and descend. Take the southern stairs to the Docks, then head left toward the Sewer System door. Across the bridge beyond that door is the Sluice Gate Mechanism.
- Enter the Sewer System and take the map from the table on the left. The tunnel farther left is your destination, but the water initially blocks access.
- Return to the manhole outside the Pet Clinic. Descend and take the Heavy Mechanical Cog from the table on the left. Open the left-hand shortcut door while you're here; it connects this section to the other tunnels.
- Back at the sluice machine, place the Heavy Mechanical Cog in the bottom-left gap and slide the movable cogs down along the bottom. Connect them so the large gear on the right turns, then use the Crank Handle in the left slot to power the machine.
- Return through the Sewer System gate at the Docks and speak to the Sheriff by the entrance. The lowered water now lets you jump into the pipe on the left.
- Follow the pipe past the motionless creatures. Take the Sewer Key attached to a creature on the left, then deal with the monsters that ambush you immediately afterward.
Don't mistake the still creatures for a cleared room. Collecting the key starts the danger, so be ready before interacting. Backtrack and use the key on the northern gate. Kill the creature on the left and open the gate beyond it to connect the tunnels with the Silver Gazette office and Loomis Park.
Where are sewer valves A, C, and B, and what is the door code?
Open A, then C, then enter 1467 at the red-lit door to reach B; opening B triggers the sewer boss.
| Valve | Route and confirmation |
|---|---|
| A | From the Silver Gazette/Loomis Park shortcut, head east to the far-right northern doorway. Turn left, vault the pipe, defeat the monster, and crouch through the left pipe to open Flow Control A. |
| C | After A, continue east through the right pipe to emerge near Quiet Hours Cafe. Enter the broken drain pipe on the right, then go north upstairs and through the Staff Only safe room. Cross the broken bridge and continue left to the clipboard with 1467, then farther left to open C. |
| B | Return to the red-lit combination door, enter 1467, climb down the ledge, and go all the way right. Opening B starts the fight. |
The Staff Only room has a phone and a panel showing the flow-control valves' status. Check that panel and save before entering the red-lit room. The door opening confirms the code; the boss appearing confirms you've activated B.
Bring antidotes and fight at range. This boss has a poisonous aura, so closing in or dodging through it quickly fills your poison meter. The North Star Shotgun with 12ga Slugs is a strong option if you have it; see silver pines weapons when choosing your loadout. Keep moving away and shoot when you have an opening.
How do you open the sewer bell hatch and reach Mount Siah Kopa?
After opening all three flow-control valves and defeating the boss, raise all three hatch pressure indicators beyond maximum to blow the hatch open.
Return to the hatch near Quiet Hours Cafe where the bell was visible through the bolted door. The Safety Notice Note on the nearby container explains the trick: excessive pressure ruptures the hatch. This looks like a pressure-balancing puzzle, but your goal is to overload it. Turn each of the three pressure valves until its indicator passes maximum, then wait for the hatch to explode.
Enter through the destroyed hatch and move into the chamber on the right. The Sheriff attacks and pins you down; follow the button prompts to defeat him. Pick up his .44 Magnum, then take Cable Station Bell (E) hanging on the right.
You leave this section with the park's F bell and the sewer's E bell, plus the Magnum and any optional Town Hall mementos you collected. Return to the Cable Car Station, fit all five bells into their matching slots, and ring them in the order on the plaque above. Once the cable car arrives, board it and continue with silver pines mount siah kopa.