
Pick Survival Horror for the intended experience, or Relaxed for easier fights. You choose your Silver Pines difficulty on the Difficulty Select screen before starting, and you can change it anytime in the options. Nightmare is the toughest choice: combat is more frequent and harder, while resources are greatly constrained.
Which Silver Pines difficulty settings should you pick?
Choose Survival Horror if you want the intended experience; choose Relaxed if story and exploration matter more to you than combat pressure.
Relaxed: Recommended for story and exploration
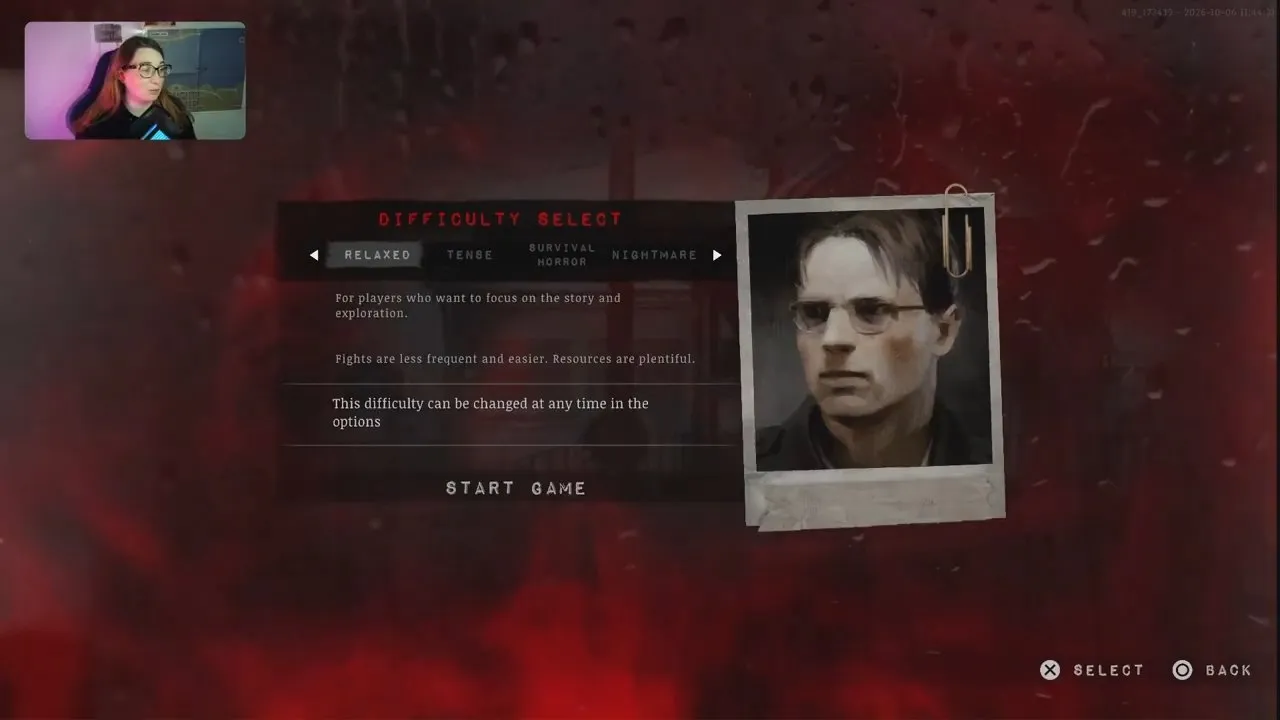
Relaxed makes fights less frequent and easier, with plentiful resources. The description explicitly points you toward story and exploration, so this is the clearest fit if you want fewer combat interruptions.
Select Relaxed and check that its name is highlighted. The panel beneath it describes easier fights and plentiful resources, confirming the choice before you select Start Game.
Tense: More forgiving combat and supplies

Tense gives you less punishing enemies that are easier to evade, plus more forgiving resource management. Pick it if you want some pressure while keeping the odds tilted in your favor.
Check for the highlighted Tense label and the description about easier evasion. For help getting comfortable with the game, continue with silver pines tips.
Survival Horror: Recommended for the intended experience

Survival Horror is explicitly described as the intended Silver Pines experience. You need to explore to find the resources required to survive, so choose it if you want searching for supplies to matter.
Confirm the highlighted Survival Horror label and the panel's exploration requirement. Make room for resource hunting as you progress; consult silver pines weapons when you want to look into your combat options.
Nightmare: Choose it for maximum pressure

Nightmare gives you more frequent, tougher combat and greatly constrained resources. Check that Nightmare is highlighted and that the description lists both changes. Pick it if that combination is the challenge you want.
What does Silver Pines Nightmare change?
Nightmare increases combat frequency and difficulty while greatly constraining resources.
The Nightmare panel above spells out both sides of the tradeoff. It can look like a straightforward harder-combat setting, but the supply pressure matters too: you face more demanding encounters with fewer resources to work with.
| Setting | Combat or exploration emphasis | Resources |
|---|---|---|
| Relaxed | Less frequent, easier fights; story and exploration focus | Plentiful |
| Tense | Less punishing enemies, easier evasion | More forgiving management |
| Survival Horror | Intended experience; exploration needed to survive | Find what you need by exploring |
| Nightmare | More frequent, tougher encounters | Greatly constrained |
If that combination sounds frustrating for your first run, Survival Horror is the steadier starting recommendation. Before tackling a demanding section, check silver pines how to save so you understand how to protect your progress.
Can you change difficulty in Silver Pines anytime?
Yes, you can change difficulty anytime in the options, including Nightmare.
Every difficulty screenshot above shows the same message beneath the mode description: the difficulty can be changed at any time in the options. Your starting choice does not lock you into that level of pressure.
- Start with the mode whose description matches what you want from the run. Confirm its highlighted name on Difficulty Select before choosing Start Game.
- If a section becomes frustrating, open the options and change the difficulty. Check the displayed difficulty name to make sure it matches your new choice.
With your difficulty chosen, head into the opening route with silver pines motel. You have a starting mode that fits your priorities and the option to adjust the pressure as you go.